SSH Into an AWS EC2 Instance (PuTTY)
< Back to BlogPre-requisits
- Access to the AWS Console
- Active EC2 instance
- Your IP whitelisted with the Security Group attached to that instance
- PuTTY/PuTTYgen – Download: https://www.puttygen.com/download-putty
- The .pem/.ppk keyfile associated with the instance
Step 1: Convert Keyfile
AWS EC2 Instances can use either a .ppk or .pem file for authentication. If you’re using a .pem, you’ll need to convert it to .ppk using PuTTYgen before connecting to your instance with PuTTY. If you haven’t already, visit the link above to download both programs before proceeding.
Open PuTTYgen
Open PuTTYgen and import your .pem file with the “Load” button (under “Generate”). This will open a file explorer you can use to select the .pem file you want to convert. Once data has populated in the top “Key” field:
- click “Save private key” (hit Yes on passphrase warning)
- Title your .ppk
You can now use this .ppk to SSH into the instance.
Step 2: Configure PuTTY
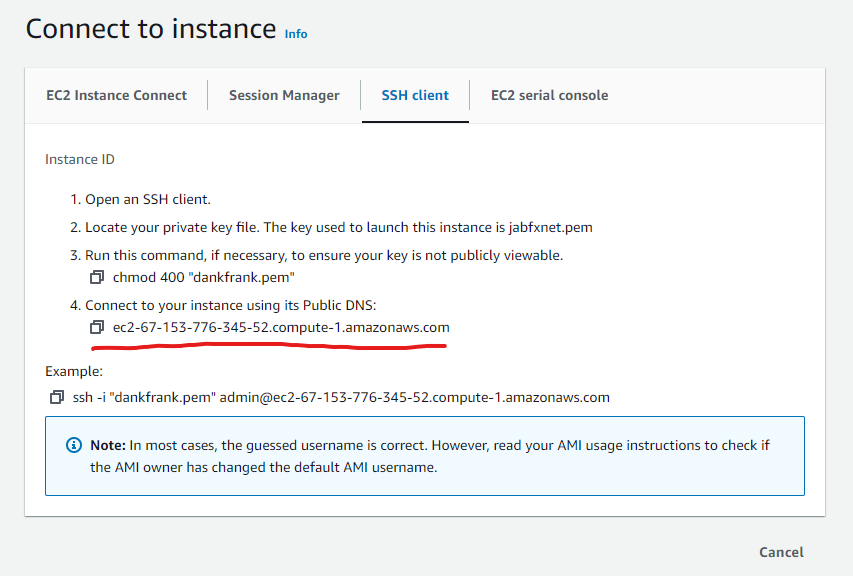
Select your EC2 Instance from the EC2 dashboard within AWS.
- Hit “Connect”
- Find the “SSH client” tab on the “Connect to instance” screen.
- Copy the domain from point 4
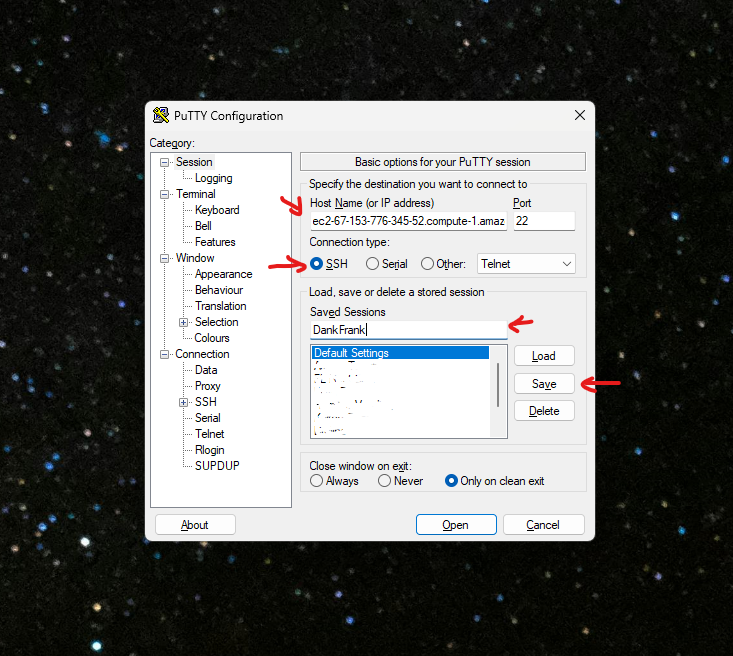
Open PuTTY. The program should default to the “Session” Category where you will see Host Name / Port fields. We will use data from our EC2 instance to populate these and other fields.
- Paste the value copied from point 4 into the Host Name field in PuTTY, then set the Port to 22 (if not already).
- Use the input field under Saved Sessions to title your connection, and hit the “Save” button so you can preserve your settings for future use.
Next we will configure the session to use our .ppk file. Still in PuTTY, on the left hand navigation tree, select Connection > SSH > Auth > Credentials. Under “Private key file for authentication:” click the Browse button.
Select your .ppk file using the opened File Explorer.
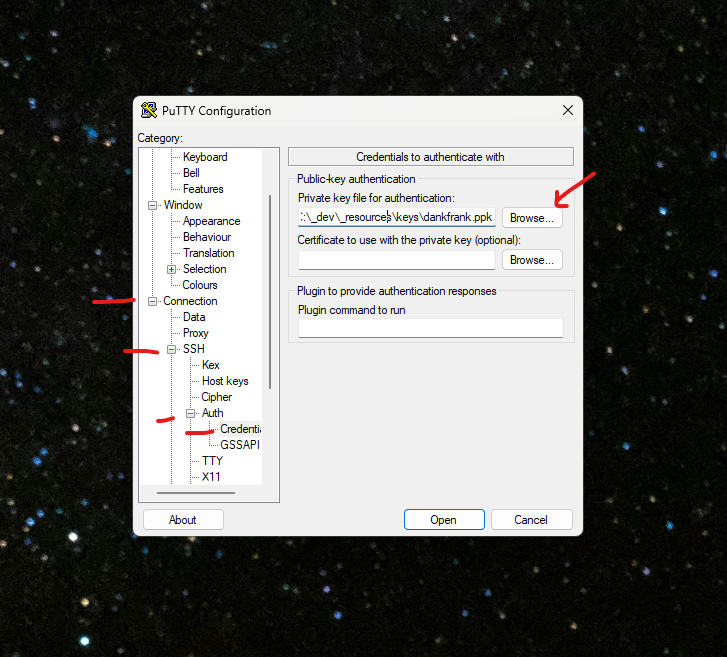
Then, go back to the top of the navigation tree, and hit “Session” to return to the default screen. HIT SAVE AGAIN to preserve your key file configuration.
Step 3: Connect w/ PuTTY
Hit “Open” to connect to your EC2 instance with the configuration you have provided. This will open up a command line window that will ask for your username. This will vary depending on the software installed, but the most common usernames I deal with are either root, admin, or bitnami.
After successfully entering your username, you should be able to perform operations on the server you have connected to.